
- Locate the Checkout Widget – Open the Widgets panel in your editor.
- Drag & Drop – Place it anywhere on your page or inside a block.
- Seamless Integration – Ensure a smooth checkout experience for customers in one click.
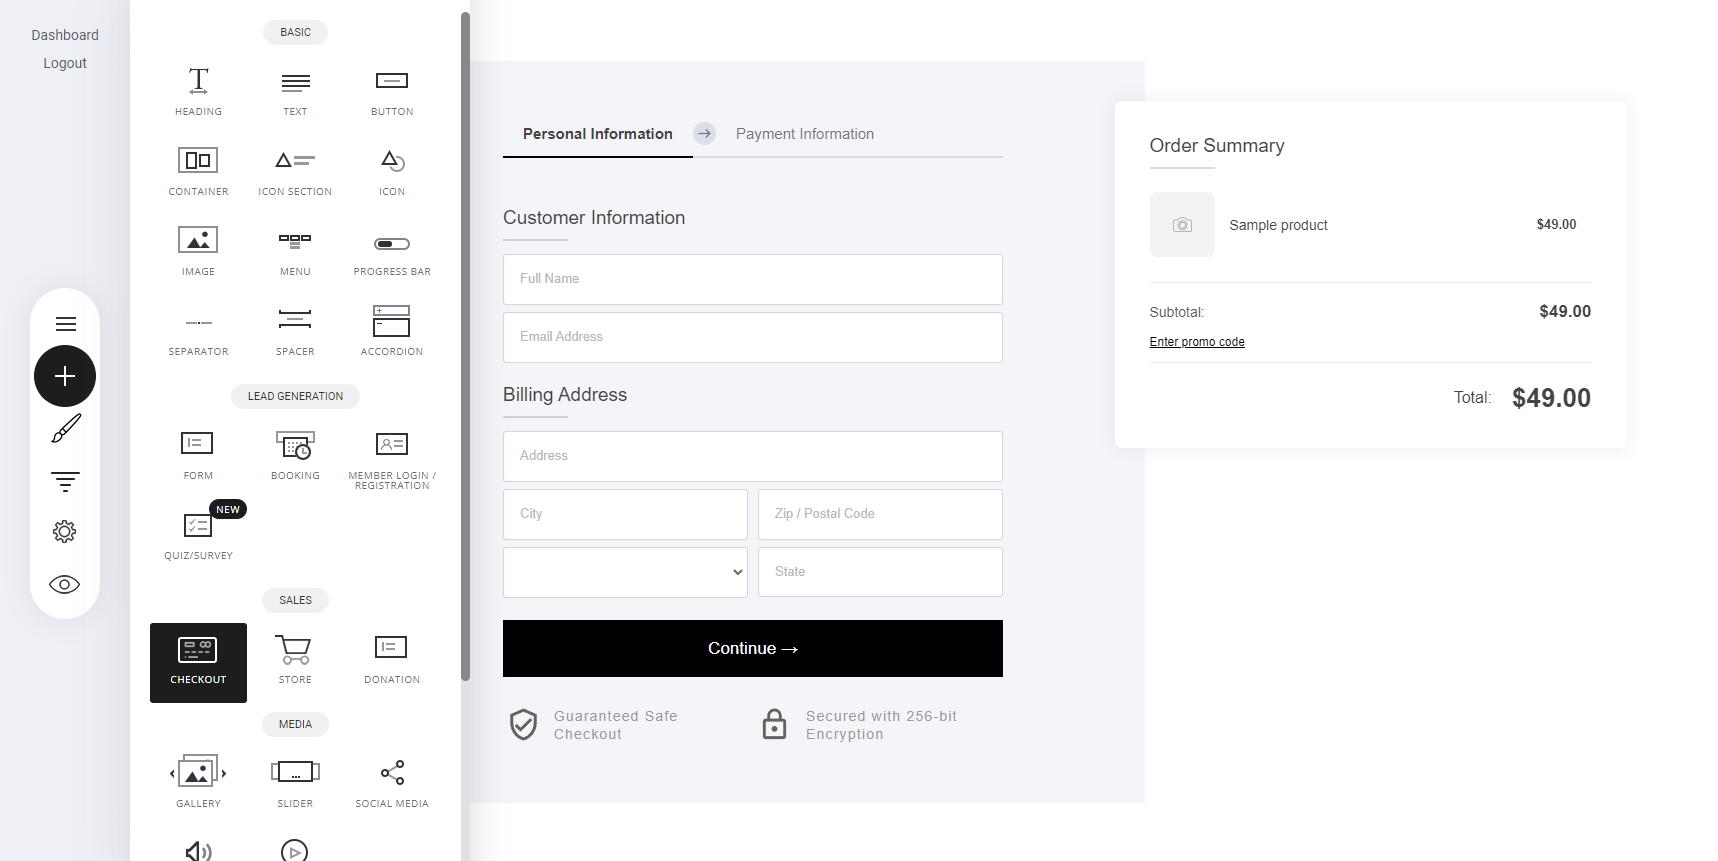
Add your product
Once you have your checkout on the page, the next step is to select the products tab as highlighted below in step 1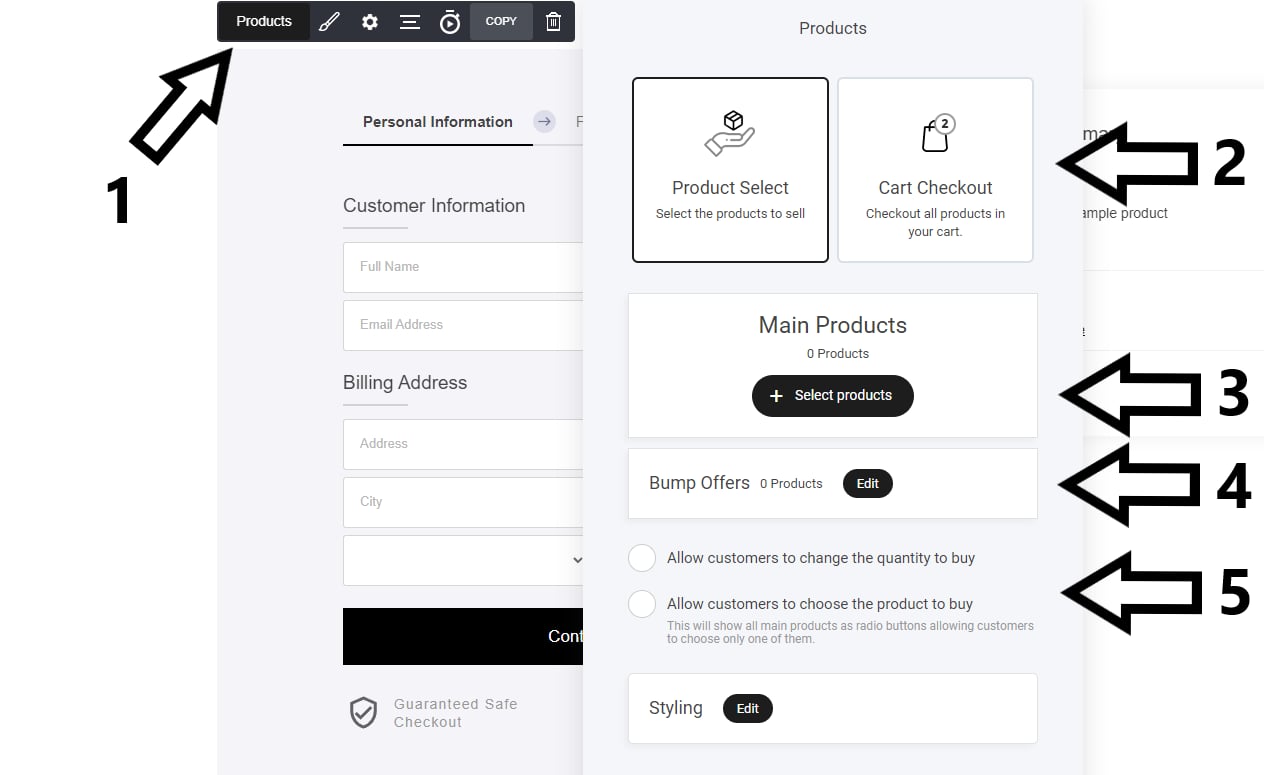
- Select the product tab
- Adding bump offers to increase cart value
- Select the product or products you want to add to the checkout.
- Here you have 2 options. Product select or cart checkout. Product select means the product or products you want to add to that specific checkout widget. Cart checkout means: If you have a previous page where users can add products to a cart and you want them to go to another page after adding items to their cart, for example in funnels this is a great option.
- Allowing users to select products if you are displaying more than one.
Selecting products
In the example below we have selected 2 store items we want to display in this checkout widget. You can modify the visual elements later on to.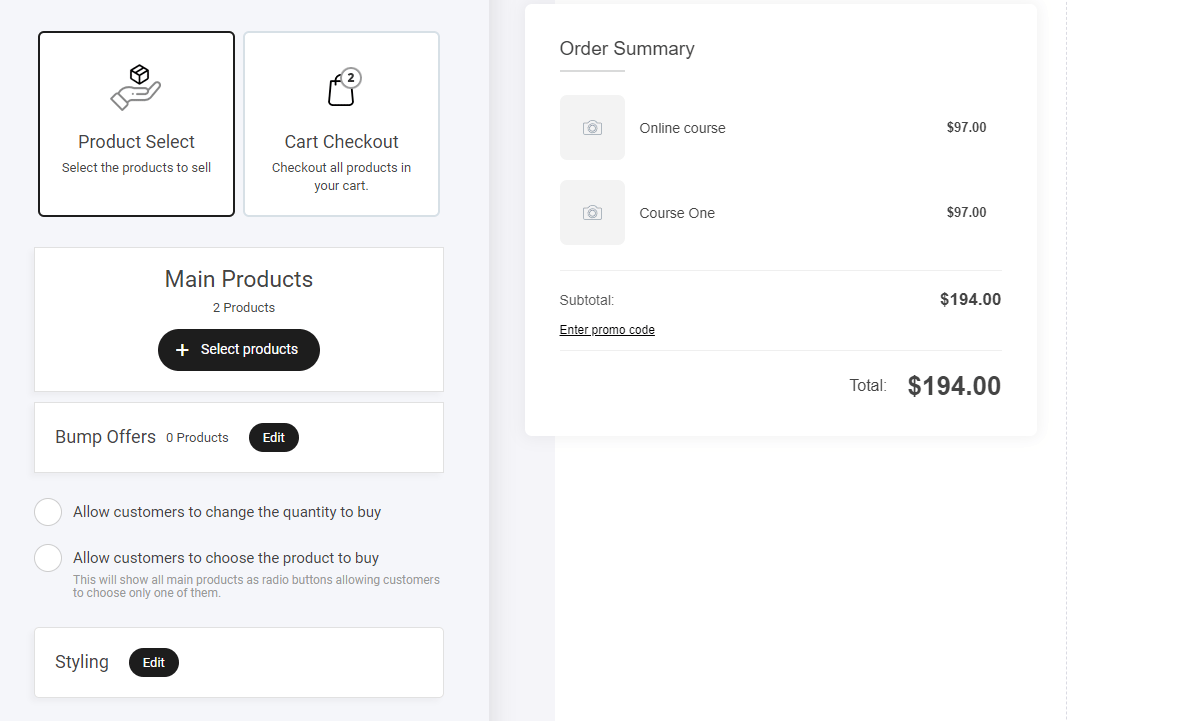
Adding bump offers
Adding bump offers can increase your overall cart revenue by displaying store items you would like to try and sell additionally to the user.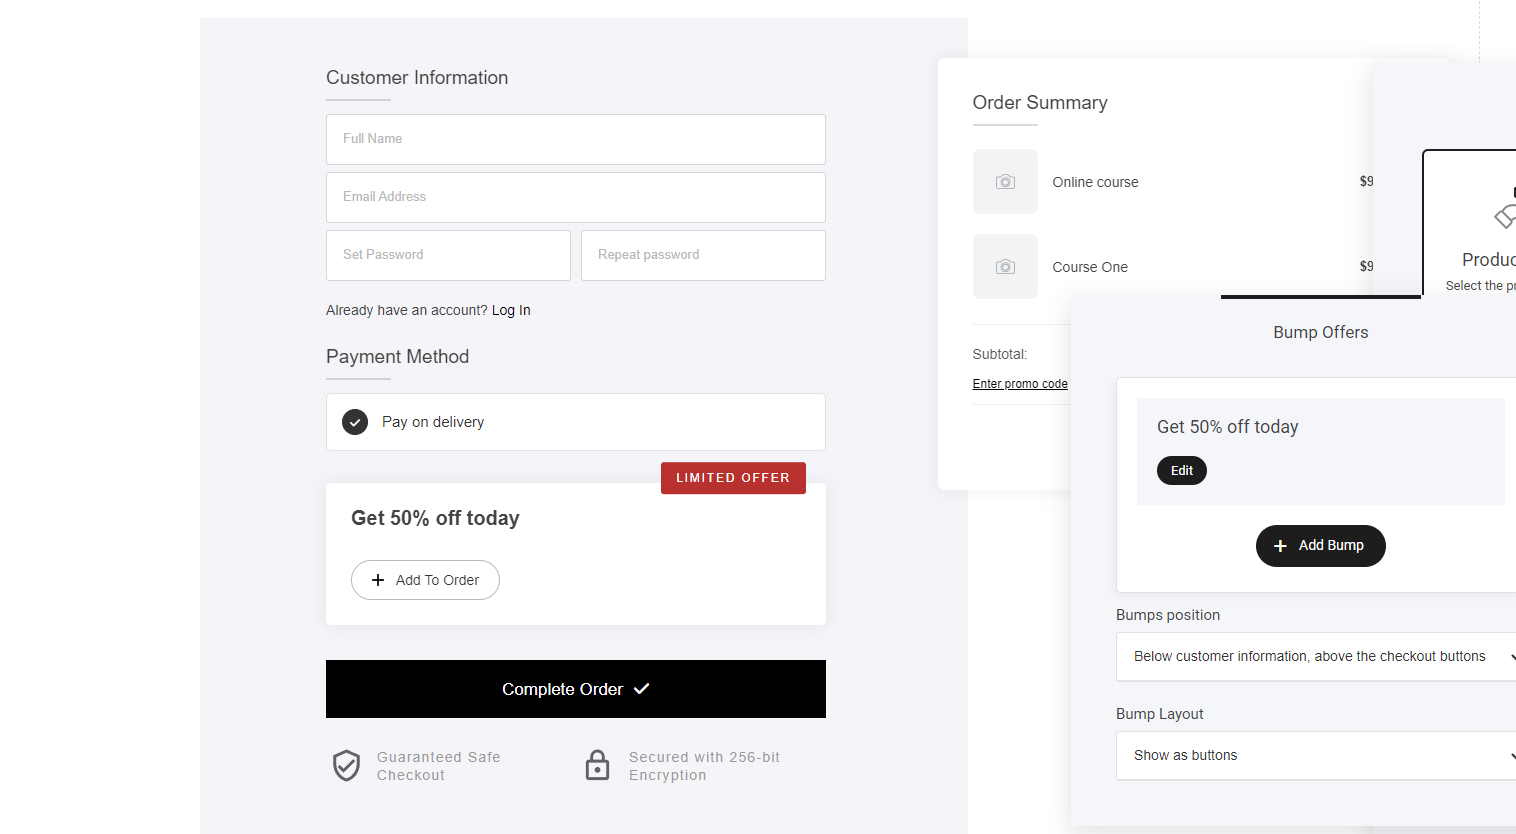
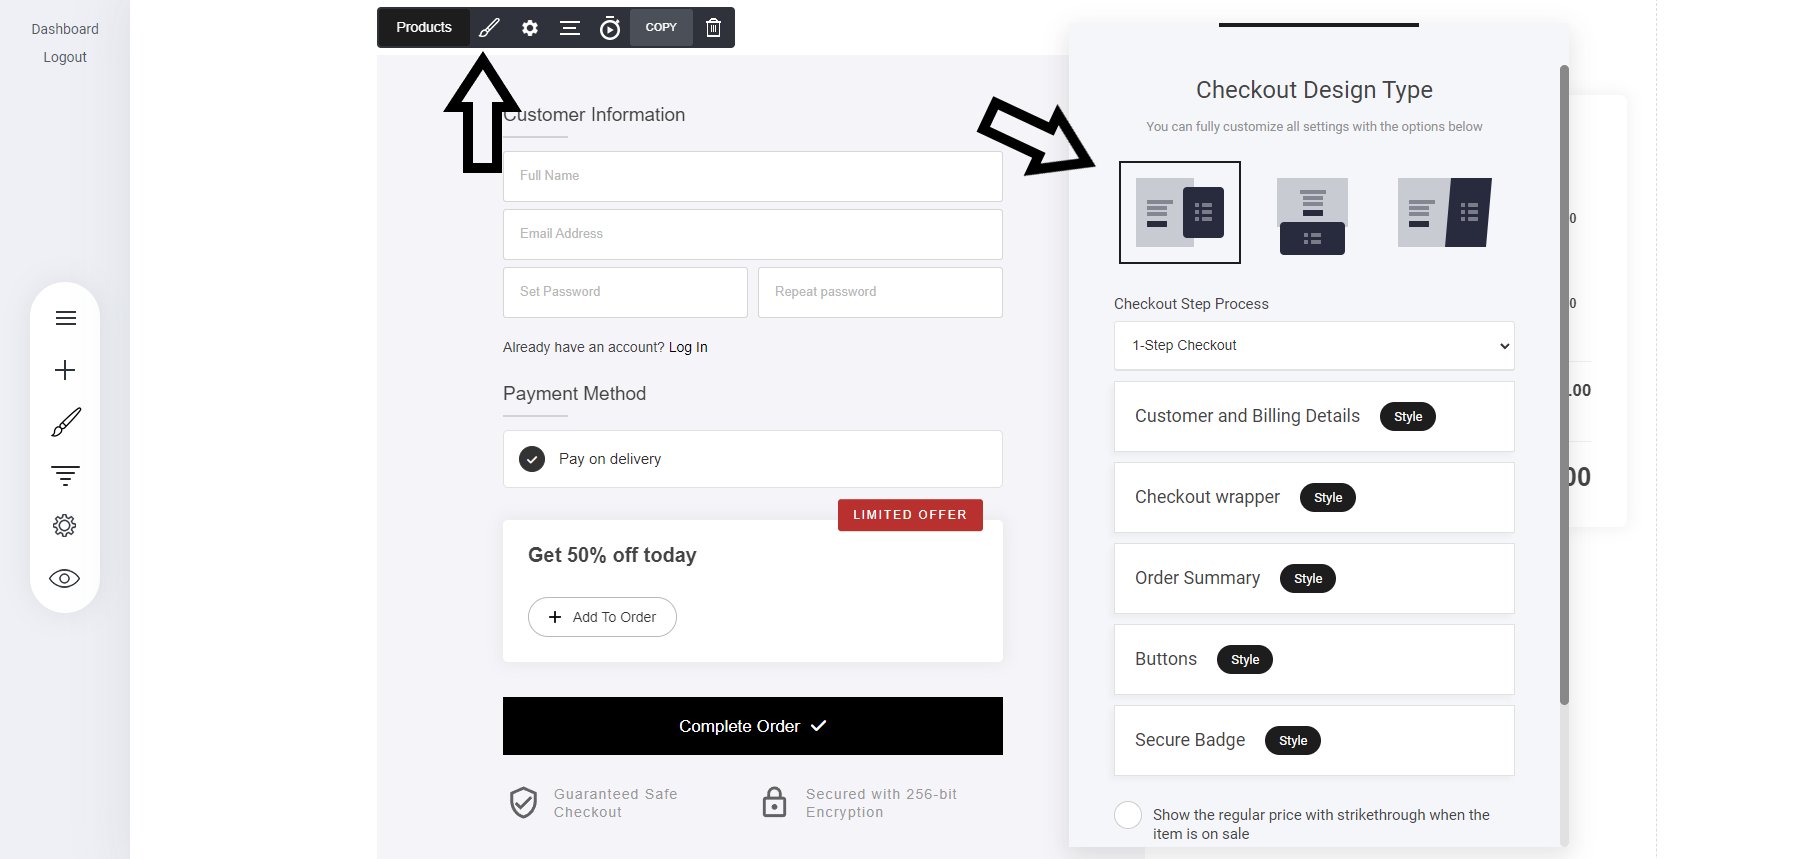
Checkout Styling
With the checkout styling you have endless options to design the perfect checkout that suits your brand. But let’s look at the important parts.- Checkout style
- Checkout step process
Checkout Settings
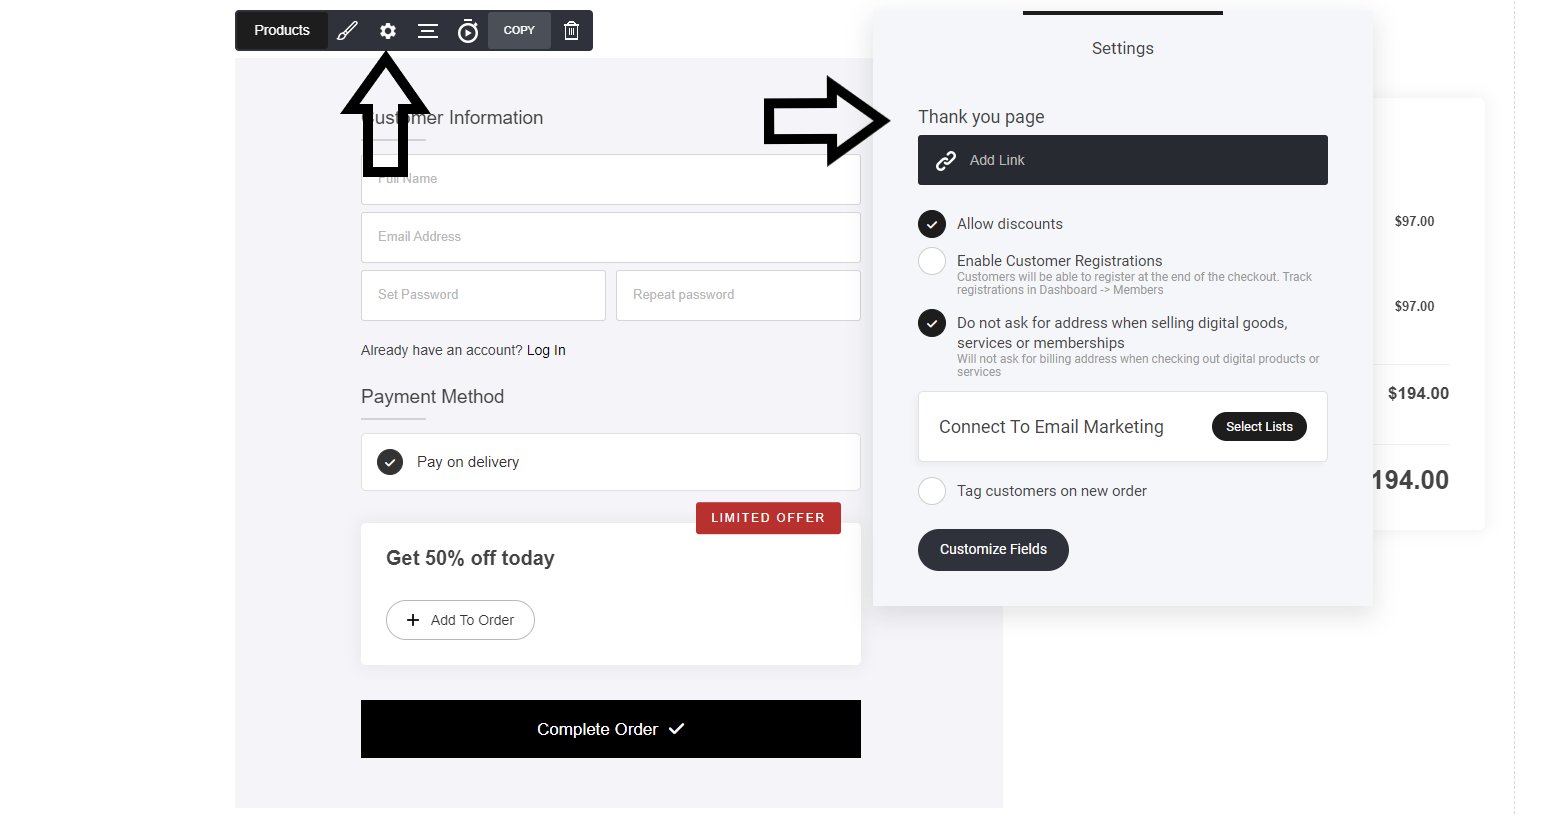
The checkout settings tab enables you to manage the more technical section where you can:- Direct people who purchase to any page
- Enable discounts
- Customer registrations
- Optional address input
- Adding customers to your email lists and adding tags for segmentation.